Introduction
This page contains the instructions required for getting up and running with the simulations for REDTOP. They are based on the assumption that you will be using lcsim-REDTOP and Netbeans. Instructions for setting up the software are available on the lcsim framework page along with three examples to check that the framework, the detector conditions and the data are installed correctly.
Example data files
Data files with extension .slcio are available from:
ftp://t1015-svn.fnal.gov/v802/slcio/
REDTOP main analysis and reconstruction modules
The reconstruction module
The reconstruction module runs on data generated by Geant4 and needs to be digitized and reconstructed.
The java driver which runs the reconstruction package is: REDTOPReconstructionDriver.java (located in the REDTOPReconstruction folder). That driver instantiates the driver where the sequence of modules actually processing the (reconstructed) data is defined. For example, REDTOPReconDriverSnowmass is such a driver. REDTOPReconDriverSnowmass lists all the modules used to reconstruct the events for the Snowmass2021 Montecarlo campaign.
The analysis module
The analysis module runs on data already being reconstructed with the above module.
Similar to the reconstruction case, the java driver which runs the analysis package is: REDTOPReconstructedParticleAnalysisDriver.java (located in the REDTOPanalysis folder). That driver instantiates the driver where the sequence of modules actually processing the (reconstructed) data is defined. For example, REDTOPReconstructedParticleAnalysisDriverContrib is such a driver. REDTOPReconstructedParticleAnalysisDriverContrib list, besides the module making the selection of events with the desired topology, also the module with your final analysis. The way for adding that is explained below.
In order to prepare your workspace in Netbeans for starting an analysis, we create first a new configuration. Here are the steps:
Step 1: update the local project
The first step is to update your local copy of lcsim-REDTOP to the head version of the svn repository. Below are the instructions. From the main Netbeans window, do the following:
Team->Update...->Update to HEAD
and wait that task to complete (check the progress bar at the bottom of NetBeans main window). Visual instructions are below.

Step 2: open the project properties and create a new configuration
From the main Netbeans window, do the following:
right-click on the REDTOP project package
REDTOP->Properties->Configuration->Add (In the box   "Configuration Id" type the name  of the new configuration. For example: Analysis-config. Click OK and then Activate)
REDTOP->Properties->Run->Configuration: -> Analysis-config
REDTOP->Properties->Run->Main Class: -> REDTOPanalysis.DriverLoop
REDTOP->Properties->Run->Arguments: xxx yyy.aida REDTOPanalysis.REDTOPReconstructedParticleAnalysisDriver zzz.slcio
REDTOP->Properties->Run->VM Options: -mx1100M
- where:
- xxx is the number of events to process;
- yyy.aida is the filename of the output histogram file;
- zzz.slcio is the filename of the input data file (slcio format)
Step 3a: Instruct the analysis driver to run your sequence of drivers.
The actual sequence is listed in REDTOPReconstructedParticleAnalysisDriverContrib.java. That is the module you need to edit and where you will be adding your personal analysis. The latter must be placed in the REDTOPcontrib package, in order to avoid confusion with the contributions by other developers. The steps for that are explained in the paragraphs below.
Step 3b: Instruct the reconstruction driver to run your sequence of drivers.
This is similar to the example above, except that the run arguments are different. In that case, the drive to indicate is
REDTOP->Properties->Run->Arguments: xxx yyy.aida REDTOPReconstruction.REDTOPReconstructionDriver zzz.slcio
The actual sequence is listed in REDTOPReconstruction.REDTOPReconstructionDriver.java. That is the module you need to edit and where you will be adding your personal reconstruction algorithms. The latter must be placed in the REDTOPcontrib package, in order to avoid confusion with the contributions by other developers. The steps for that are explained in the paragraphs below.
The REDTOPcontrib package
In order to organize the contribution from several individuals, the REDTOPcontrib Java package has been created. All personal contributions and classes should be located in that package. The name of the contributor should appear on the filename. An example is the gattoRedtopHitAnalysis.java class. If a contributor wants to modify and run a class outside of the REDTOPcontrib package, that class has to be copied in the REDTOPcontrib package and renamed as specified above.
There are two ways to add a personal analysis driver to the framework:
- Making a standalone class to REDTOPcontrib package;
- Adding your driver to the sequence specified in REDTOPReconstructedParticleAnalysisDriverContrib.java
Both methods are explained below. Please, be aware that the content of the driver you will be adding is slightly different for the two methods.
Adding and running a standalone class (analysis and/or reconstruction)
Step 1: refactor copy an existing standalone driver
A standalone driver is a class called by the REDTOP main event loop. It is used to extract information directly from the event and it does not need the full reconstruction chain. It is the easiest, but also the least flexible way of making an analysis.
The easiest way to contribute with a new class with this method is to start from an existing class, by copying it to REDTOPcontrib and modifying it according to your desire. The process of copying a class while maintaining the correct dependencies is “called refactor copy”. Suppose, for example, that you would like to work at a copy of the RedtopHitAnalysis.java class present in the REDTOPMC. Then you have to follow the steps below.
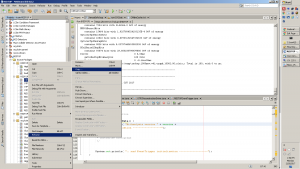
- Right-click on the name of the class (RedtopHitAnalysis.java, in this example)
Refactor->Copy...
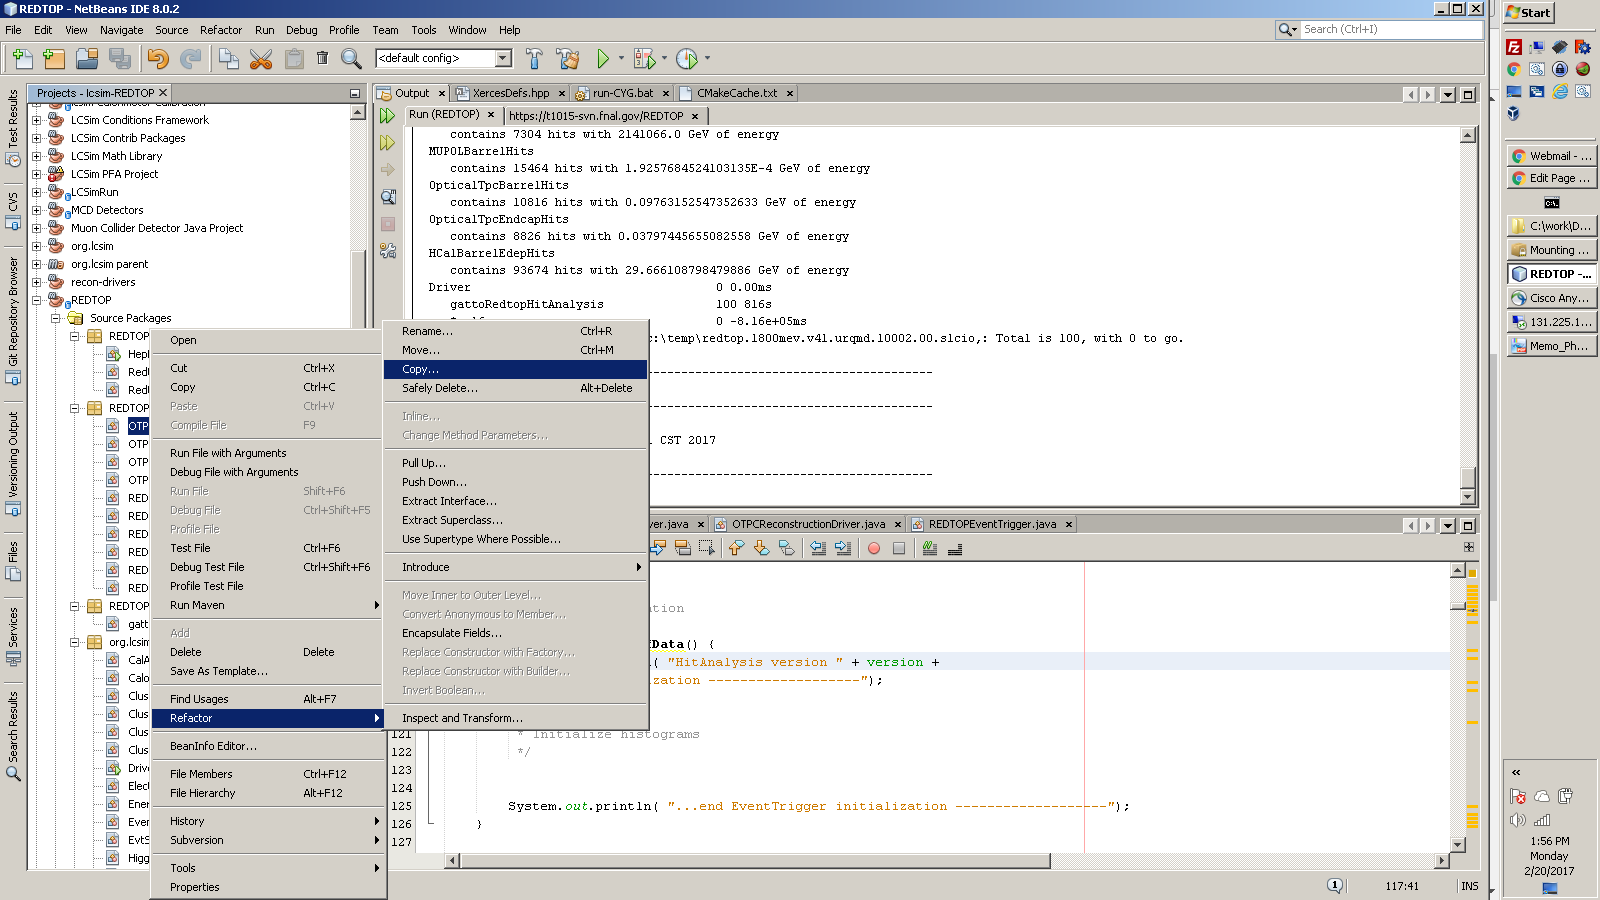
 A window would pop-up asking which is the “New name” of the file and the “Package” where to copy RedtopHitAnalysis.java. The former is a name of your choice (preceded by your last name), while the latter is the REDTOPContrib folder. In the present example, the filename is gattoRedtopHitAnalysis
Leave the remaining text box untouched.
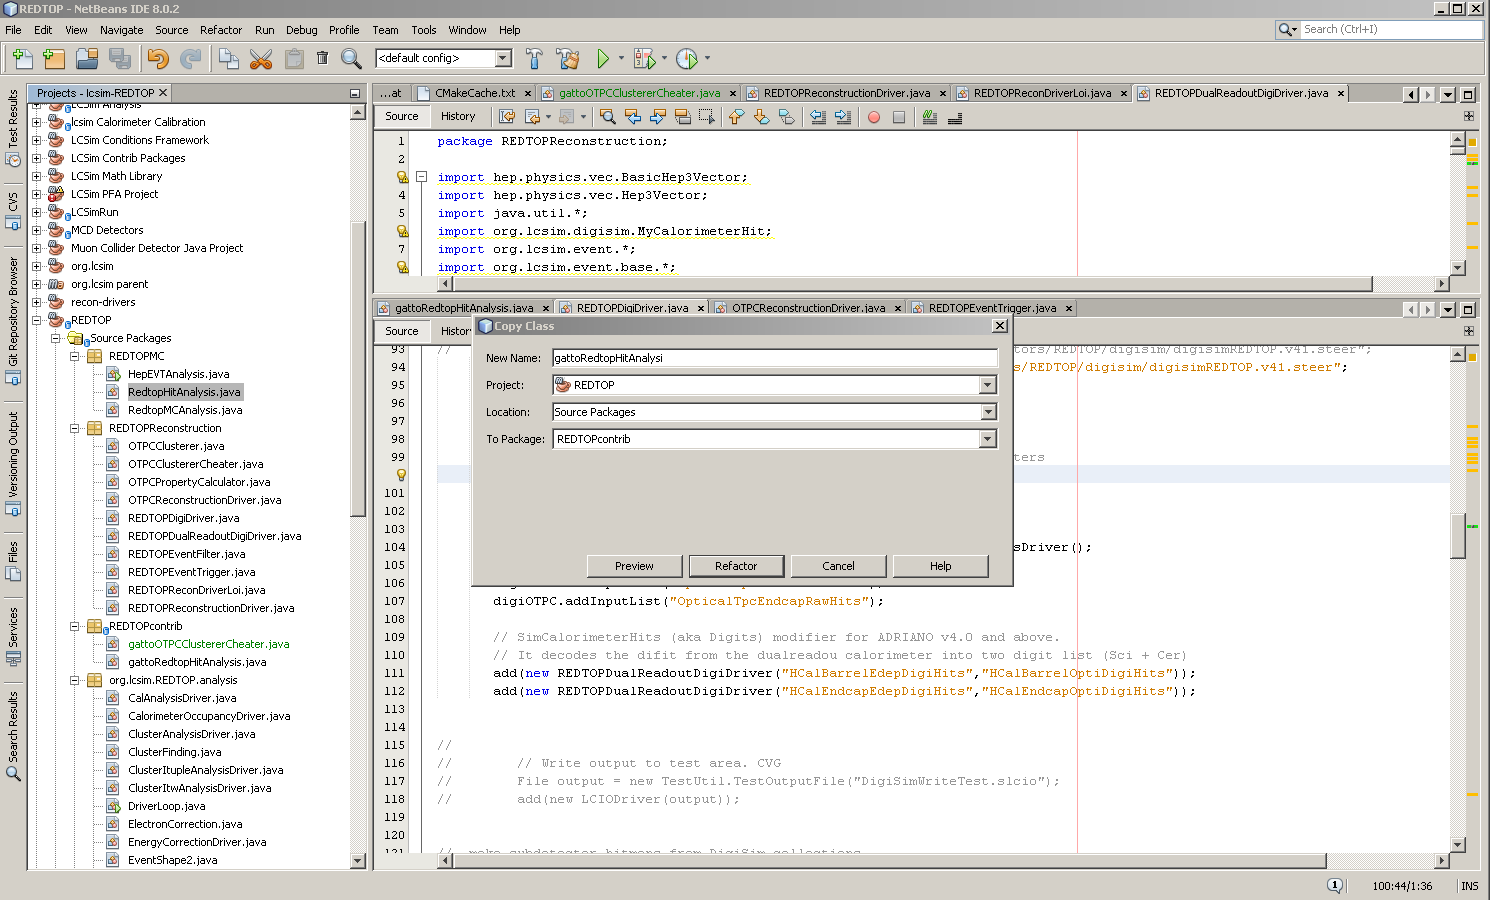
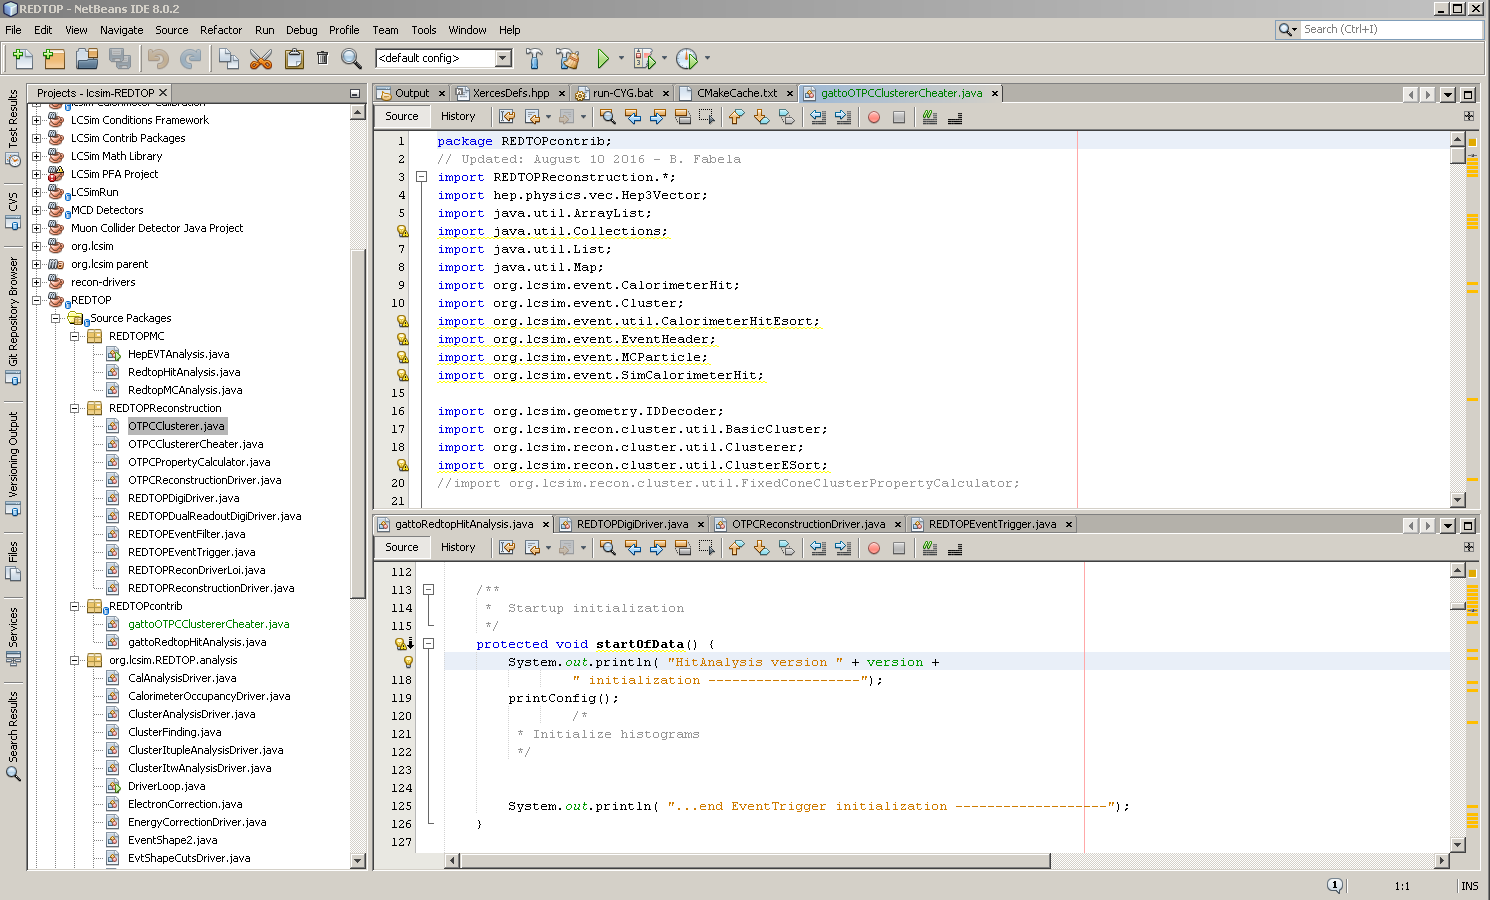
- Push the “Refactor” button. The pop-up window will close and the refactored class appears in the REDTOPcontrib folder.
Step 2: Instruct REDTOP main event loop to run using your new driver
Now, you need to instruct lcsim-REDTOP to run your driver. The procedure is very similar to Example #2 at the bottom of the LCSIM reconstruction framework web page.
- Now, we need to give the project the arguments to recognize you driver. In order to do that, right click on the project package and make sure that the following parameters are present :
-
REDTOP->Properties->Run->Configuration: -> <Analysis-config>
REDTOP->Properties->Run->Main Class: -> REDTOPanalysis.DriverLoop
REDTOP->Properties->Run->Arguments: xxx yyy.aida  REDTOPcontrib.gattoRedtopHitAnalysis zzz.slcio
REDTOP->Properties->Run->VM Options: -mx1100M
where (see also the picture below):
- xxx is the number of events to process;
- yyy.aida is the filename of the output histogram file;
- zzz.slcio is the filename of the input data file (slcio format)
-
- The pop-up properties window, will, then, look similar to the image below. Edit the “Arguments” input box according to your input/output files ans enter the four arguments mentioned above.
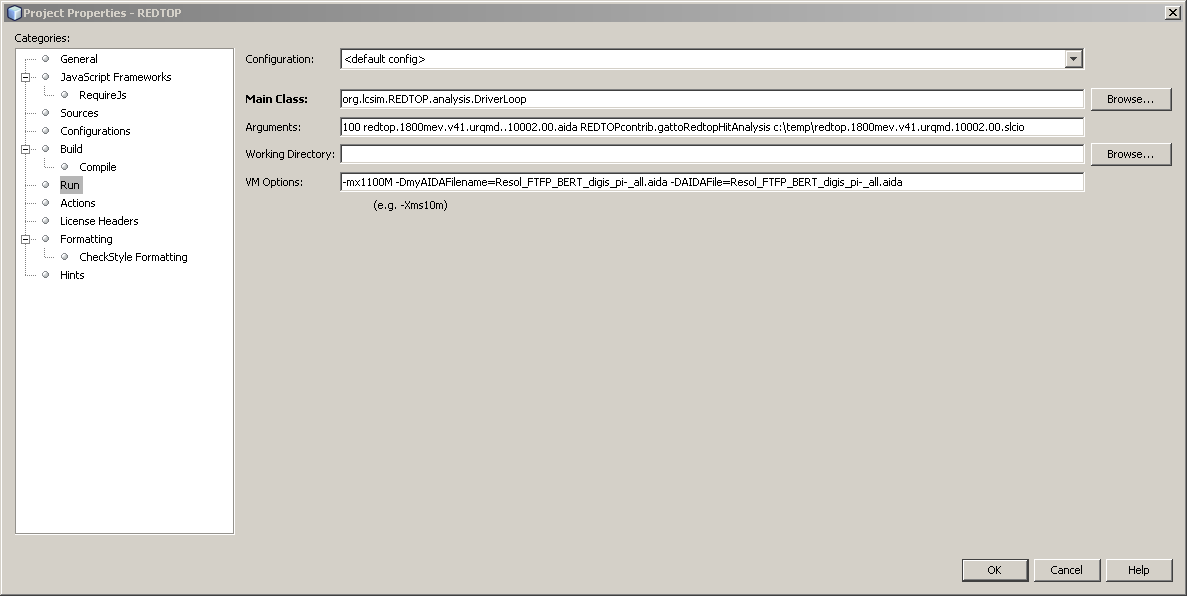
- Click the OK button. The pop-up window will close
- Make sure that in the config textbox, at the center of the top toolbar of Netbeans, the <default-config> is selected.
Step 3: Build and running your driver
- In the Project panel select the project REDTOP. Right-click on that and, from the popup menu, select: Clean and build;
- When it is done building, if everything went OK, you will get a green message saying: BUILD SUCCESS. Otherwise, something went wrong: you need to control the error messages and fix the problem accordingly.
- To run your new, right-click on the REDTOP project name (in the left panel) and select “run”. Alternatively, click on the right green arrow in the middle of Netbeans toolar.
Adding an analysis or reconstruction driver class to the main sequence of REDTOP drivers
This is the most flexible and powerful way of making an analysis or writing tasks related to digitization/reconstruction of data. As explained above, an analysis (reconstruction) driver is a dependent class listed by the main analysis (reconstruction) package among the sequence of modules to be executed. Each module corresponds to a specific task (for example, the digitization or the simulation of the trigger). It is used to modify or add a process to the analysis (reconstruction) chain.
Step 1 (optional): update the local project
The first step is to update your local copy of lcsim-REDTOP to the head version of the svn repository. Below are the instructions. From the main Netbeans window, do the following:
Team->Update...->Update to HEAD
and wait that task to complete (check the progress bar at the bottom of NetBeans main window). Visual instructions are below.
Step 2: refactor copy the main analysis (reconstruction) driver
The best way to contribute with writing a new class is to start from an existing class, copy to REDTOPcontrib, and modifying it according to your plans. The process of copying a class while maintaining the correct dependencies is “called refactor copy”. Suppose, for example, that you would like to work at a copy of the OTPCClusterer.java class present in the REDTOPReconDriverSnowmass package, then you have to follow the steps below.
- Right-click on the name of the class (OTPCClusterer.java, in this example)
Refactor->Copy...
- A window would pop-up asking which is the “New name” of the file and the “Package” where to copy OTPCClusterer.java. The former is a name of your choice (preceded by your last name), while the latter is the REDTOPContrib folder. In the present example, the filename is gattoOTPCClustererCheater.
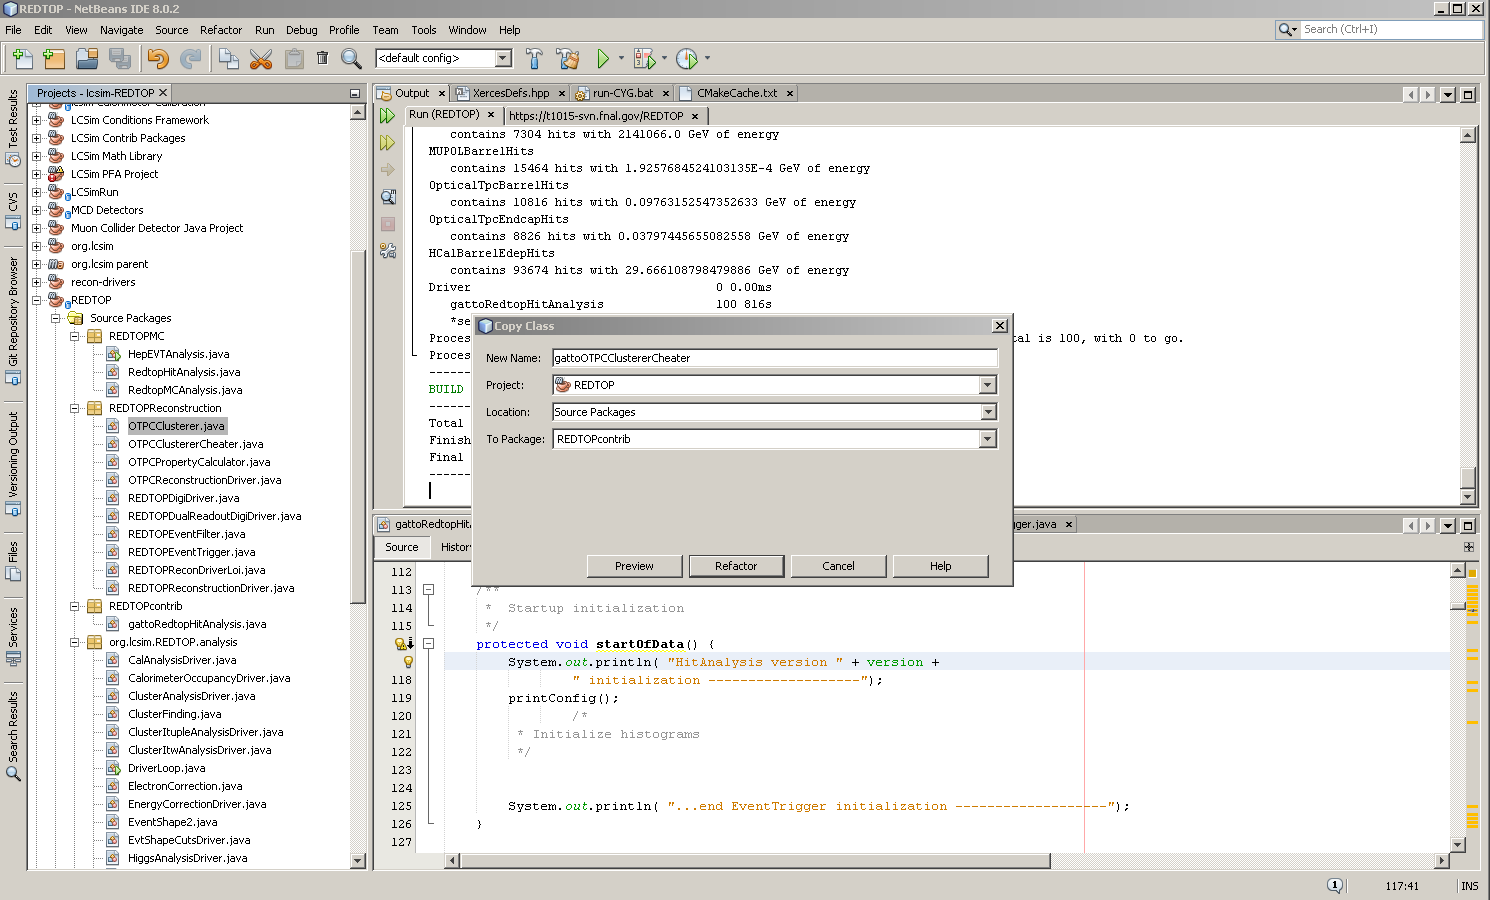
Leave the remaining text box untouched.
- Push the “Refactor” button. The pop-up window will close and the refactored class appears in the REDTOPcontrib folder.
Step 3a: Instruct REDTOPReconstruction to run your own driver
Now, you need to instruct the reconstruction chain to run your driver. The reconstruction chain is formed by the following sequence of classes:
REDTOPReconstruction.REDTOPReconstructionDriver()
    |->  REDTOPReconstruction.REDTOPReconDriverSnowmass()
               -> REDTOPReconstruction.REDTOPDigiDriver()
                  REDTOPReconstruction.REDTOPEventTrigger()
                  REDTOPReconstruction.OTPCDigiDriver()
                  REDTOPReconstruction.ADRIANOSingleReadoutRawClusterDriver()
                             .
                             .
                             .
Therefore, you need to modify your personal copy of the class which is supposed to call your driver. Two instructions need to be inserted:
import REDTOPcontrib.the_name_of-your-refactored_class;
at the beginning of REDTOPReconstruction.REDTOPReconDriverSnowmass.java. In the current example, that would be:
import REDTOPcontrib.gattoOTPCClustererCheater;
The second instruction to insert is an instantiation of your driver:
add(new the_name_of-your-refactored_class());
in the body of REDTOPReconstruction.REDTOPReconDriverLoi.java (very much dependent on the taks performed by your driver). In the current example, that would be:
add(gattoOTPCClustererCheater());
Step 3b: Instruct REDTOPanalysis to run your own driver
This is similar to the case above. You need to instruct the reconstruction chain to run your driver. The analysis chain is formed by the following sequence of classes:
REDTOPanalysis.REDTOPReconstructedParticleAnalysisDriver()
    |->  REDTOPanalysis.REDTOPReconstructedParticleAnalysisDriverSnowmass()
               -> REDTOPanalysis.REDTOPReconstructedParticleSkimDriverSnowmass()
                  any-analysis-driver
                             .
                             .
                             .
Therefore, you need to modify your personal copy of the class which is supposed to call your driver. Two instructions need to be inserted:
import REDTOPcontrib.the_name_of-your-refactored_class;
at the beginning of REDTOPanalysis.REDTOPReconstructedParticleAnalysisDriver.java. In the current example, that would be:
import REDTOPcontrib.gattoEta3piMCAnalysis;
The second instruction to insert is an instantiation of your driver:
add(new the_name_of-your-refactored_class());
usually at the end of the body of REDTOPanalysis.REDTOPReconstructedParticleAnalysisDriver.java. In the current example, that would be:
add(gattoEta3piMCAnalysis());
Eventually, comment-out or remove other analysis drivers specific for a different analysis (any-analysis-driver in the list above).
Step 4: Build and run your driver
Since the REDTOP project is already instructed to run the reconstruction, all you have to do is to build and run REDTOP. For doing this, just follow the instruction in Example #3 at the bottom of the LCSIM reconstruction framework web page.
Templates for running the physics analyses
The following standalone drivers are present in the REDTOPcontrib folder as templates for making a physics analysis, as described in Sec. 1 of the simulation document.
eta3pi analysis: gattoEta3piMCAnalysis.java
- input file in: ftp://t1015-svn.fnal.gov/U0/v4.1/slcio/ (example: ftp://t1015-svn.fnal.gov/U0/v4.1/slcio/redtop.1800mev.v41.eta3pi.10001.1.00.slcio )
Heavy photon analysis (A’ and X(17)): gattoEtaGammaAprimeMCAnalysis.java
- input file in: ftp://t1015-svn.fnal.gov/U0/v4.1/slcio/ (example: ftp://t1015-svn.fnal.gov/U0/v4.1/slcio/redtop.1800mev.v41.hphch.10001.1.00.slcio and ftp://t1015-svn.fnal.gov/U0/v4.1/slcio/redtop.1800mev.v41.x17.10001.1.00.slcio )
pi0-scalar analysis (H-> e+ e- and mu+mu-): gattoEtapi0HMCAnalysis.java
- input file in: ftp://t1015-svn.fnal.gov/U2/v4.1/slcio/ (example: ftp://t1015-svn.fnal.gov/U2/v4.1/slcio/redtop.1800mev.v41.pi0h250ee.10001.1.00.slcio and ftp://t1015-svn.fnal.gov/U2/v4.1/slcio/redtop.1800mev.v41.pi0h250mumu.10001.1.00.slcio )
Background files are in: ftp://t1015-svn.fnal.gov/1/v4.1/slcio/ and ftp://t1015-svn.fnal.gov/2/v4.1/slcio/ (example: ftp://t1015-svn.fnal.gov/1/v4.1/slcio/redtop.1800mev.v41.urqmd.10003.00.slcio and ftp://t1015-svn.fnal.gov/2/v4.1/slcio/redtop.1800mev.v41.inclxx.10053.01.slcio )